

Where warnings appear
Property and object profiles - Applied warnings are listed in the Warnings section, most severe first. Selecting one opens its full text. The mobile app shows the same section on a property or object. Maps - Warning layers highlight the properties that carry a warning. See Map layers. Tables - Filter a properties table by warning to build a working list, for example every property over the SI/SD threshold. See Creating views. Public website - Only warnings set to Shown to public appear on a property’s public page. Everything else stays internal.Built-in warnings
Built-in warnings apply and clear themselves as a property’s data changes. Nobody has to keep them current.
For a built-in warning you can change its severity and visibility and make it inactive. Its group, object type, title, and text are fixed, and it can’t be deleted.
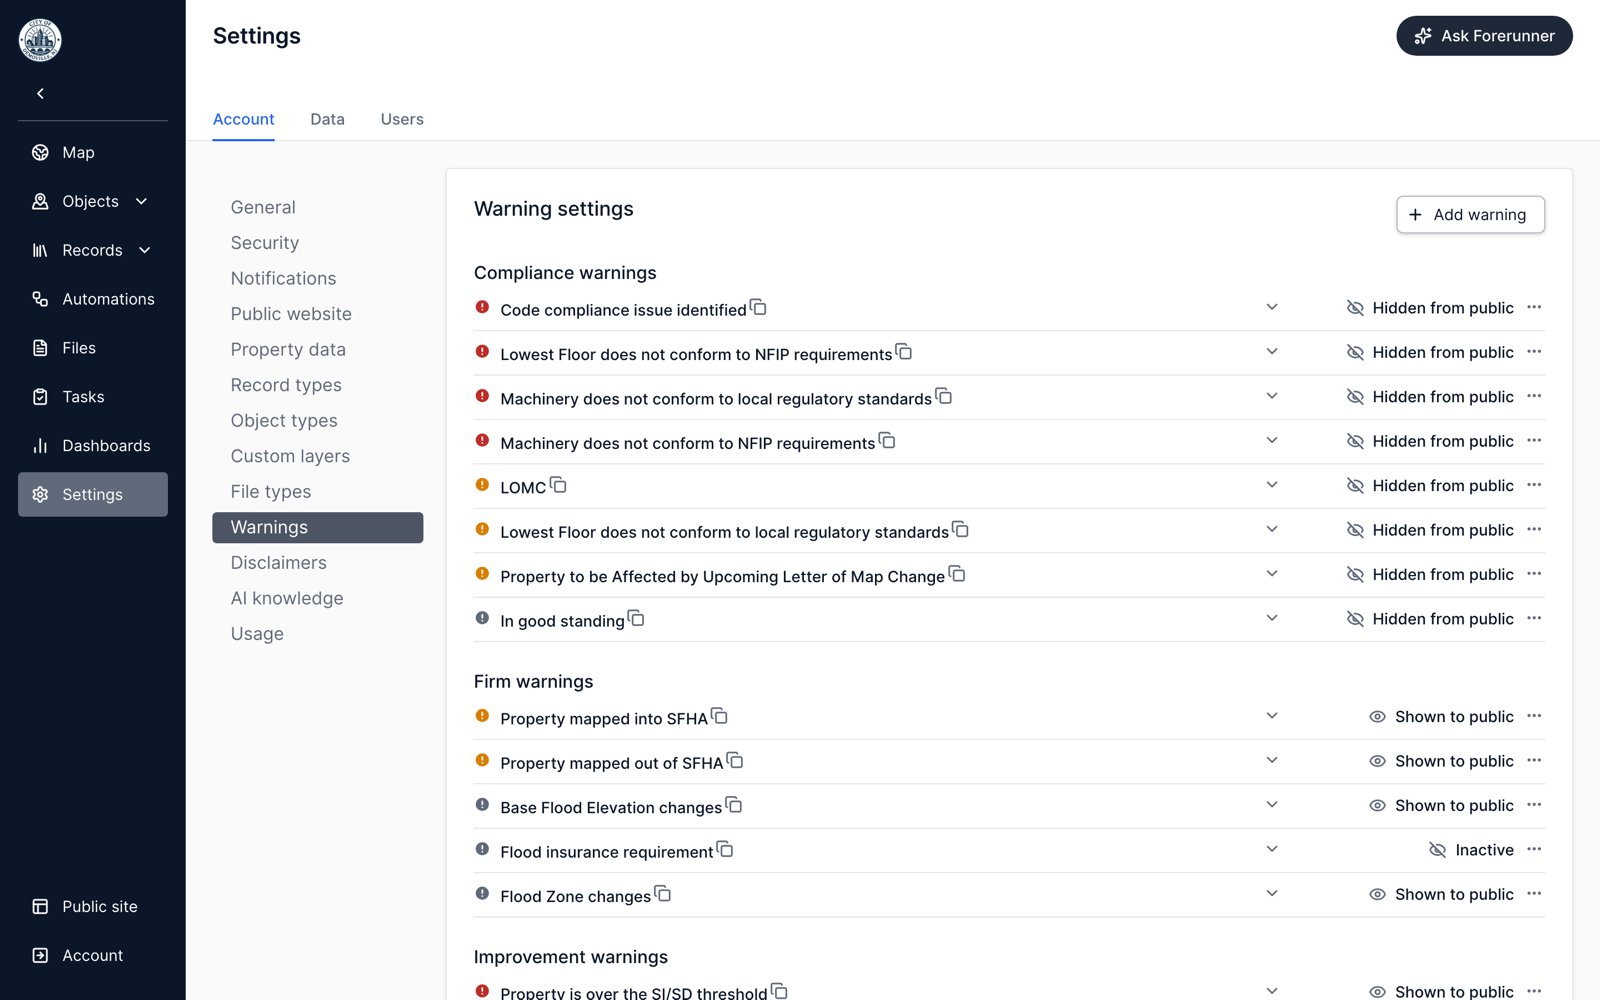
Repetitive Loss warnings are sensitive. They can’t be shown to the public, and internally they’re visible only to users with the Can view PII permission. See Managing repetitive loss.
Create a custom warning
1
Open warning settings
Go to Settings > Account > Warnings. The page lists every warning in your account with its current visibility. Anyone can view it, but only Managers and Creators can add, edit, or delete warnings.
2
Select Add warning
Choose Add warning in the top right.
3
Choose the group and object type
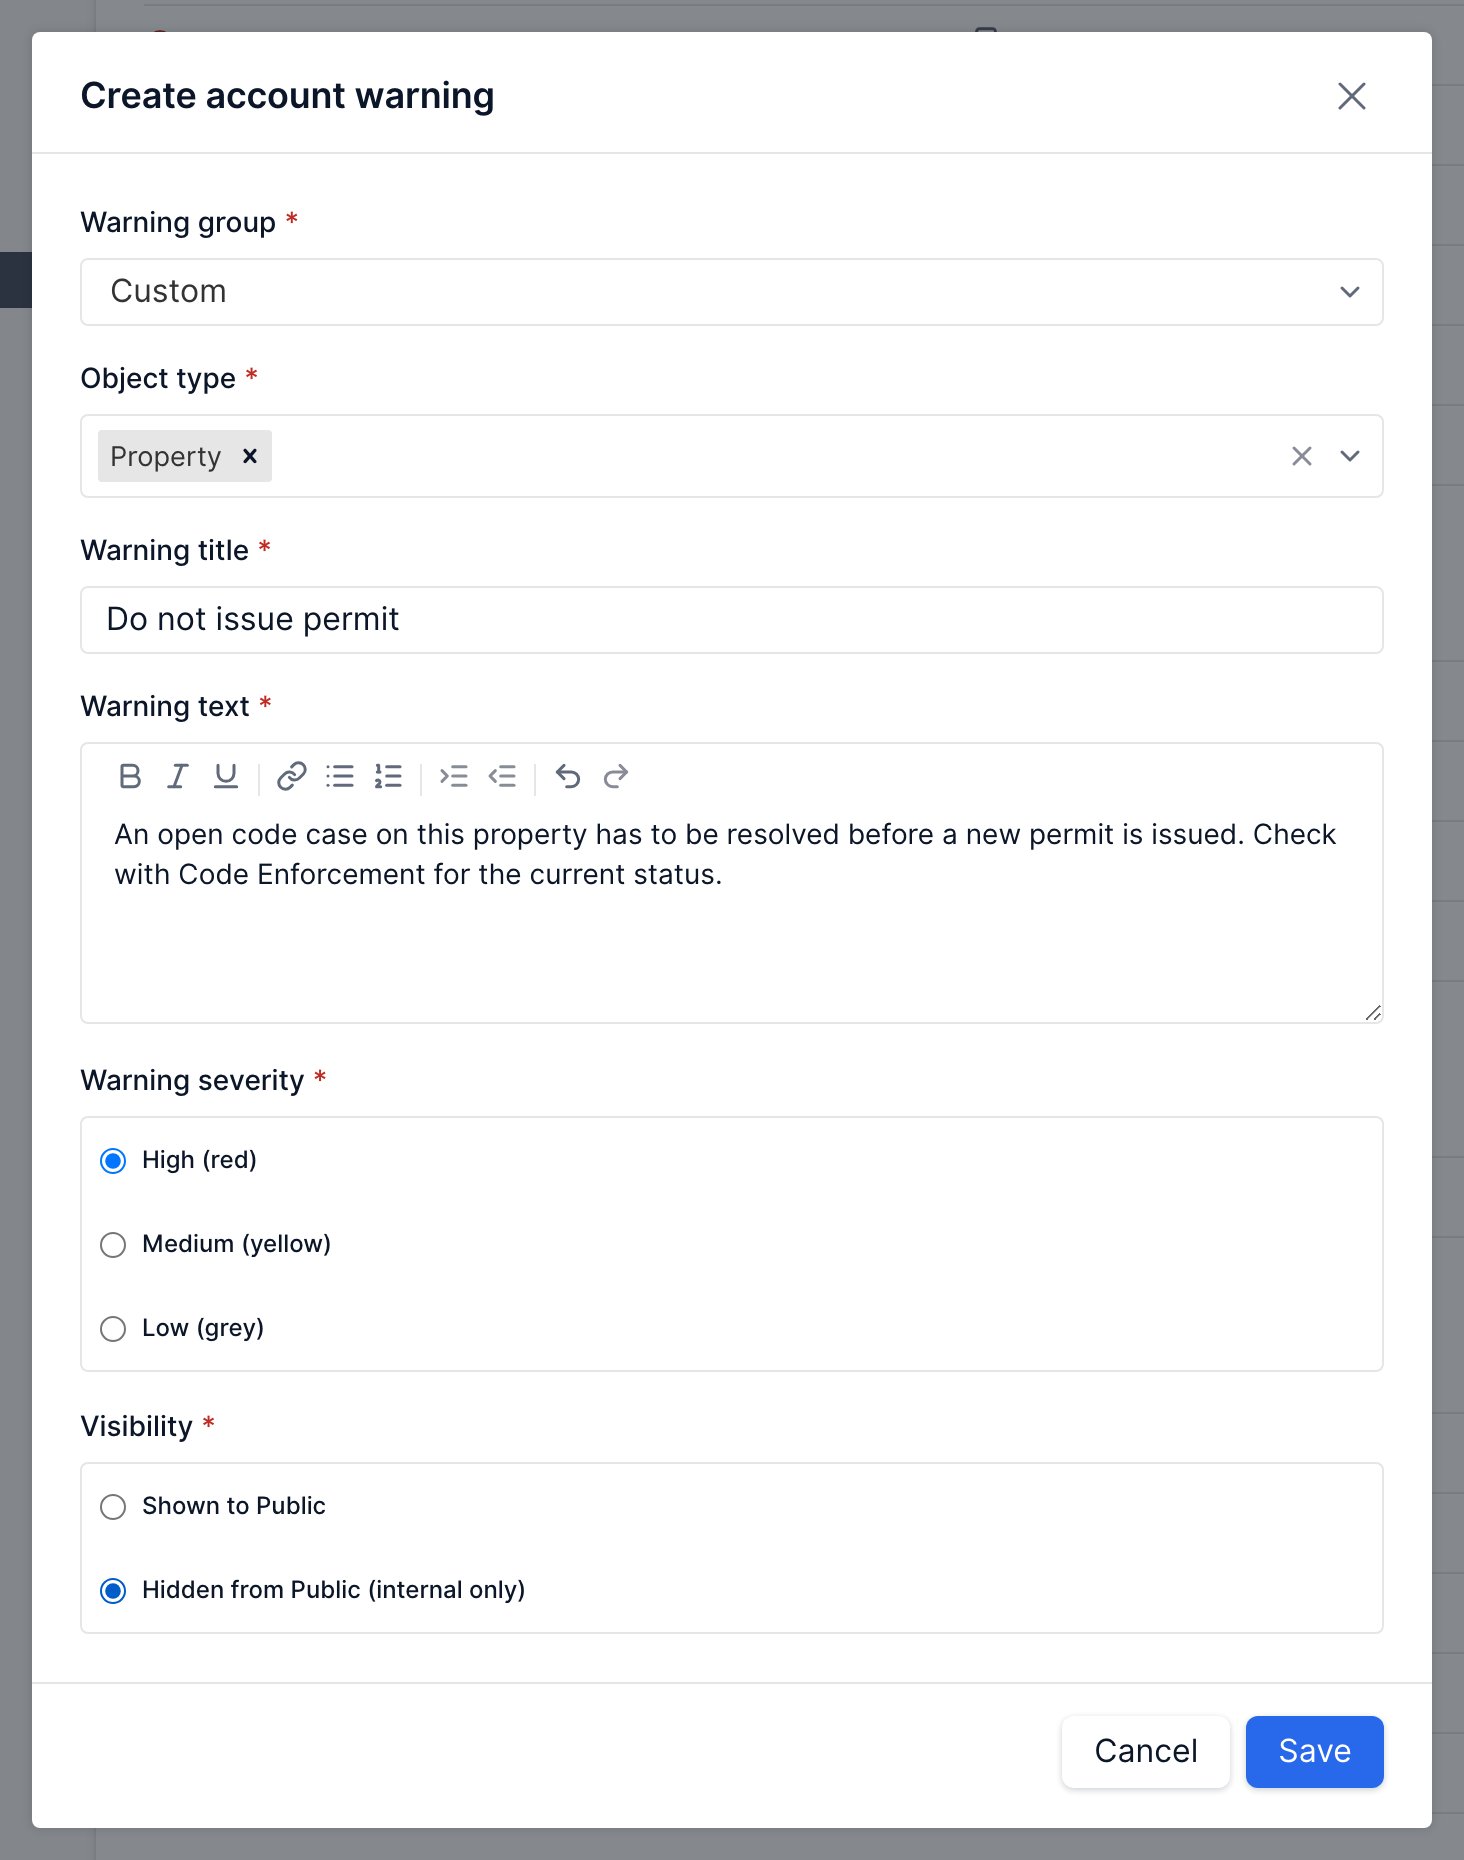
Pick a Warning group. Most custom warnings go in Custom, but you can file one under any group except Repetitive Loss so it sits next to related built-in warnings. Under Object type, choose the properties or objects the warning can apply to.
4
Write the title and text
The Warning title is what shows in the Warnings section and on the map. The Warning text is the detail someone reads when they open it, so say what the person should do about it, not just what is true.
5
Set the severity
High (red), Medium (yellow), or Low (grey). Severity sets the color and sorts the Warnings section, so keep red for things that should stop work.
6
Set the visibility
Shown to Public or Hidden from Public (internal only). This choice appears once your public website is enabled. Improvement warnings stay hidden while Show Substantial Improvement / Substantial Damage is off in your public website settings.
Apply a warning
Custom warnings don’t apply themselves. There are two ways to put one on a property or object: By hand - Open the property or object, select Edit warnings in the Warnings section, and switch the warning on. The same modal switches a warning back off. Managers and Members see this button. In the mobile app, use Edit in the Warnings section. With an automation - Add an Update a warning action to an automation and choose Apply warning or Clear warning. This is how you keep a warning in step with your records, for example applying a “Do not issue permit” warning when a code case opens and clearing it when the case closes. See Building automations.Retire a warning
Make a warning inactive when you want it out of the way but want to keep the history. Choose Make warning inactive from the warning’s menu. It disappears from property profiles and from the Edit warnings modal, and you can make it active again at any time. Delete a warning to remove it permanently. Only custom warnings can be deleted. Deleting takes it off every property and object it was applied to, along with those entries in the activity history.Related topics
- Map layers - Warning layers on the map
- Building automations - Applying and clearing warnings automatically
- Managing repetitive loss - Repetitive Loss data and permissions
- User roles - Who can create and edit warnings